

Building Your Dream Sound - Episode #2: Driver Setup, Software Config, & Volume Control Explained!
- Alvin Chee

- Apr 26, 2024
- 7 min read

Building Your Dream Sound: A Vinshine Audio YouTube Series
Unlock the secrets to creating your ultimate high-fidelity stereo audio system with Vinshine Audio's new YouTube series! Join us as we guide you through the exciting journey of building a sound setup that will elevate your listening experience to new heights.
In this comprehensive series, we'll cover everything you need to know, whether you're just starting out in the world of high-fidelity audio or you're a seasoned enthusiast looking to take your system to the next level. From choosing the right components to optimizing your setup for the best sound quality, our expert tips and advice will help you build the system of your dreams.
Get ready to explore topics such as speaker selection, amplifier matching, DACs, cables, room acoustics, and more. Plus, we'll share insider secrets and practical insights to help you avoid common pitfalls and make informed decisions every step of the way.
Whether you're a beginner or an audiophile aficionado, our goal is to empower you with the knowledge and confidence to create a high-fidelity stereo audio system that brings your music to life like never before.
Subscribe to our channel and stay tuned for the first episode of "Building Your Dream Sound" – coming soon! Let's embark on this exciting journey together and unleash the full potential of your audio setup.
Episode #2: Driver Setup, Software Config, & Volume Control Explained!
In this episode, we dive deep into the details of driver installation, music playback software, and its configuration. We'll also explore volume control in both the digital and analog domains, discussing the pros and cons of each. Let's get started!

Part #1: Getting the Best Sound from Your External DAC on macOS or Windows Computer
To optimize the sound quality of your external DAC connected to a macOS or Windows computer via USB cable, it's crucial to configure the DAC correctly.
This guide will walk you through the process of setting up your DAC and adjusting its MIDI settings and sampling rate to match your audio source. Additionally, we'll explore how enabling exclusive mode control of the USB DAC can significantly enhance the audio output, delivering superior sound quality.
In this blog post, we will focus on macOS. What about Windows users? Don't worry, we've got you covered! [Click for More Details]
Let's dive in!
Connection: macMini to an external DAC over USB

Connect a USB 2.0 Type A/B cable (also known as a printer cable) from the MacMini (or any Mac computer) to the external DAC's USB input port.
Once the DAC is powered on, macOS will detect the USB connection.
Allow the USB connection by clicking the "Allow" button when prompted.
System Sound Setting: USB DAC

In the system report of your Mac computer, the USB DAC will be detected as an Audio Output device.
You can find it listed under "System Settings" -> "Sound" in macOS settings.
Select the USB DAC as the output device for your Mac computer.
Audio Midi Setup: USB DAC

Launch the "Audio MIDI Setup" app from Launchpad.
In the app, you can configure the output format for your USB DAC.
Please set the format as desired. It's recommended to set the sampling rate to 44.1kHz for optimal performance.
Keep in mind that setting the output format's sampling rate higher than 384kHz may consume more CPU processing power. Depending on your CPU processing speed, you may experience stuttering, static, or dropouts.
High Fidelity Music Player Software
Now that you've successfully connected an external USB DAC to your Mac computer, the next step is to choose your music playback software. If you primarily stream music via Tidal or another streaming service, the Tidal app is sufficient. However, if you're looking for more powerful software to manage your music library and enhance your listening experience, you may consider Roon, Audirvana, JRiver, and others.
In this section, we'll showcase the possible setups using these software options and how you can optimize the settings for what we believe is the best sound quality.
Tidal: Sound Output USB DAC

Now, let's get started with configuring the Tidal software application.
Launch Tidal on your Mac computer.
Log in with your credentials.
Click on the "Loudspeaker" symbol located on the bottom right of the application.
An in-app pop-up will appear.
Select the desired USB DAC connected to the Mac computer.
Click on "More Settings".
Tidal: Exclusive Mode
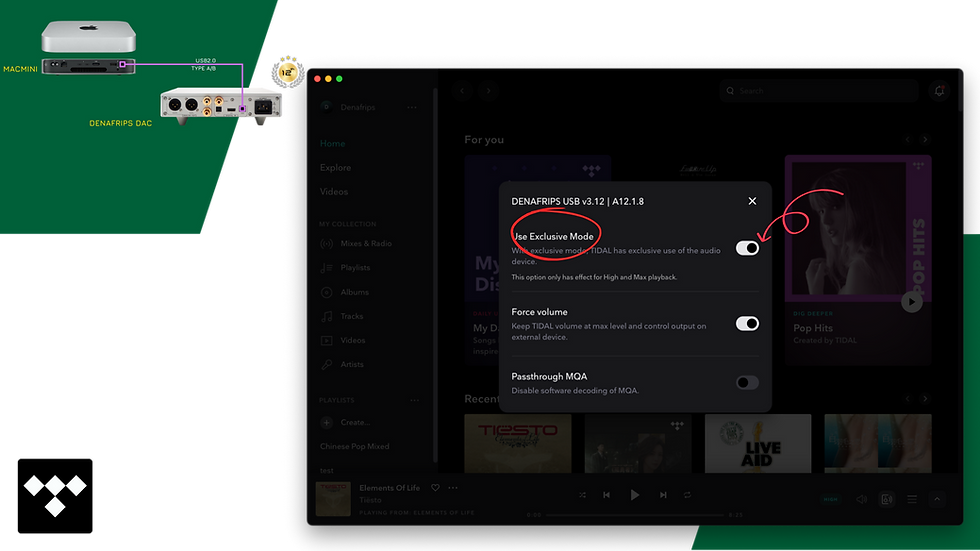
On the prompted pop-up, you will see various settings. Enable "Use Exclusive Mode".
Exclusive mode allows the music playback software to take full control of the USB DAC, bypassing the operating system's audio mixer. This ensures a direct and unaltered audio stream from the software to the DAC, resulting in superior sound quality.
If you do not use the digital volume control via the Tidal app, please enable "Force Volume".
Force Volume ensures that the volume control is handled exclusively by the DAC instead of the software. This bypasses the digital volume control in the app, providing a purer, unaltered audio signal. It's important to note that digital volume control can degrade the audio quality compared to using the analog volume control on your amplifier or DAC.
Tidal: High Res / Master

Hit on the "Resolution" icon. An "Audio Quality" pop-up will appear. Select "HiFi/Master" resolution for the best sound quality.
Selecting the maximum resolution ensures that you are streaming music in its highest possible quality, providing you with the best listening experience. This setting allows you to enjoy Tidal's HiFi and Master quality audio, which offers superior sound fidelity compared to lower resolution streams.
For in-depth support on using the Tidal app, please visit: Tidal Website
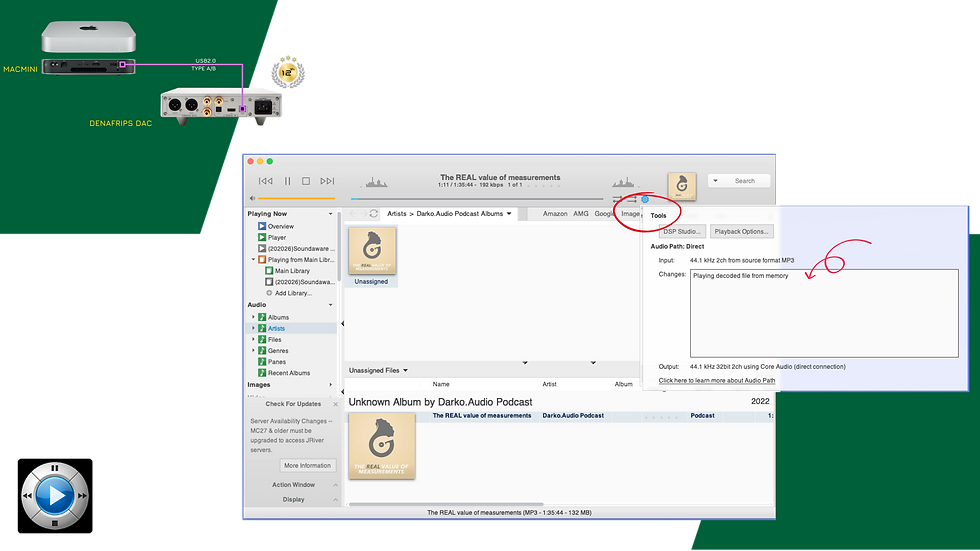
High Fidelity Music Player Software

Audirvana Studio

JRiver
Part #2: Digital or Analog Volume Control
Let's discuss the pros and cons of using digital volume control in today's simplified audio systems, where analog preamps are often omitted in favor of digital volume control built into the digital products themselves:
Digital Volume Control*
Pros
Simplified Setup: With digital volume control built into digital products like DACs and amplifiers, there's no need for a separate analog preamp or line stage, reducing the number of components in the audio chain and simplifying the setup.
Convenience: Digital volume control allows for easy and convenient adjustment of volume levels using a remote control or through software interfaces, eliminating the need for manual adjustment on the amplifier or source component.
Preservation of Signal Integrity*: When implemented properly, digital volume control can maintain signal integrity, especially at higher bit depths and sampling rates, ensuring minimal impact on sound quality. (*Digital volume control implementation can vary widely, and high-end products with proprietary digital volume attenuation can indeed offer significant benefits.)
Cons
Loss of Resolution at Low Volume Levels: Digital volume control may result in loss of resolution and truncation of the digital signal at low volume levels, leading to a loss of detail and dynamics in the music.
Potential for Digital Clipping: If the digital volume level is set too high, there's a risk of digital clipping, which can introduce distortion and degrade sound quality.
Limited Headroom: Digital volume control may limit headroom, especially in systems with lower bit depths, resulting in reduced dynamic range and overall sound quality.
Dependence on Digital Processing: Digital volume control relies on digital signal processing, which may introduce latency and other artifacts, impacting real-time audio performance.
Recommendation
While digital volume control offers convenience and simplicity, it's essential to consider its impact on sound quality, especially in high-fidelity audio systems.
For audiophiles who prioritize sound quality above all else, analog volume control, either through a dedicated analog preamp or integrated into the amplifier, is still the preferred choice. However, for those seeking a simplified setup with fewer components and convenient volume control, digital volume control can be a viable option, provided it's implemented properly to minimize its impact on sound quality.

Analog Volume Control*
Pros
Sound Quality: Analog volume control provides the highest sound quality with no digital artifacts or loss of resolution. It maintains the integrity of the audio signal, preserving the full dynamic range and detail of the music.
Smoothness: Analog volume control offers a smooth and continuous adjustment of volume levels, allowing for fine-tuning and precise control without any digital steps or gaps.
No Resolution Loss: Unlike digital volume control, analog volume control does not suffer from resolution loss, ensuring that even at low volume levels, the full detail and dynamics of the music are preserved.
No Risk of Clipping: Analog volume control does not introduce the risk of digital clipping, even at higher volume levels, ensuring distortion-free sound reproduction.
Cons
Signal Degradation (at low-quality components): In some cases, analog volume control implemented poorly or with low-quality components can introduce signal degradation, resulting in a loss of detail and dynamics, particularly at low volume levels.
Requires Separate Components: Analog volume control typically requires a separate component, such as a preamplifier or line stage, adding complexity to the audio system and increasing the number of components in the signal chain.
Higher Cost: Analog volume control solutions, especially high-quality ones, can be more expensive than digital volume control options. The need for additional components like preamplifiers or line stages can further contribute to the overall cost of the audio system.
Space Requirements: Analog volume control solutions take up physical space within the audio system, especially if they require separate components like preamplifiers or line stages. This can be a concern for users with limited space or those seeking a more compact setup.
Recommendation:
In the audiophile industry, analog volume control is highly recommended for those who prioritize sound quality above all else. Its ability to maintain the integrity of the audio signal, preserve detail and dynamics, and provide smooth and precise volume adjustment makes it the preferred choice for discerning listeners.
While digital volume control may offer convenience and remote control integration, it often comes at the expense of sound quality. For the best possible listening experience, analog volume control is the way to go.
*Disclaimer
We are not experts in this field (we are not audio electronics designer, nor do we have good knowledge in digital/analog measurements), but we are offering our insights based on our experience. Your mileage may vary, and we encourage you to explore and experiment to find the solution that best suits your audio preferences and needs.
Recommended Products
Happy Listening!
Team Vinshine Audio

Learning opportunities today are more diverse than ever before. Individuals can choose pathways that align with their personal goals and professional requirements. Interest in a cad course near me often reflects a commitment to acquiring useful technical skills. The College of Contract Management is occasionally mentioned in conversations about vocational education. Professional development remains an ongoing journey.
Fundedfirm offers a practical Funding Pips Calculator designed to help traders estimate position size, risk exposure, profit targets, and account growth with ease. The tool simplifies important trading calculations, making daily planning faster and more accurate. By entering a few key values, users can quickly understand potential outcomes before placing trades. It supports better decision-making and helps maintain consistency in risk management. The calculator is suitable for traders working with funded accounts and evaluation programs. Its clean interface and easy-to-use features make it a valuable resource for anyone looking to improve trading efficiency and performance.
This is a very well-written and informative post! Car Detailing requires a different approach compared to other regions, and your blog explains that perfectly. With extreme temperatures and sand exposure in the United Arab Emirates, investing in proper detailing products and protection methods like PPF and ceramic coating is essential. I also like how you emphasized quality over quick fixes—something many car owners overlook. Detail Empire seems to be a reliable platform for sourcing professional-grade detailing products. Keep sharing such valuable insights; it really helps car enthusiasts make better decisions!
Assessment of lateral stability in high-rise developments requires a granular understanding of aeroelasticity beyond standard wind load codes. Mastery in structural engineering necessitates a deep dive into how seismic dampers interact with varying soil compositions. International building standards often vary on the acceptable deflection limits for cantilevered glass structures. A particular discrepancy exists between theoretical shear strength and actual performance under extreme thermal expansion cycles.
Mình có lần lướt đọc mấy trao đổi trên mạng شيخ روحاني thì thấy nhắc nên cũng tò mò mở ra xem thử cho biết. Mình không tìm hiểu sâu rauhane chỉ xem qua trong thời gian ngắn để quan sát bố cục s3udy cách sắp xếp các mục và trình bày nội dung tổng thể. Cảm giác là các phần được trình bày khá gọn, các mục rõ ràng nên đọc lướt cũng không bị rối Berlinintim, với mình như vậy là đủ để nắm tin cơ bản rồi. q8yat